Your Cart is Empty


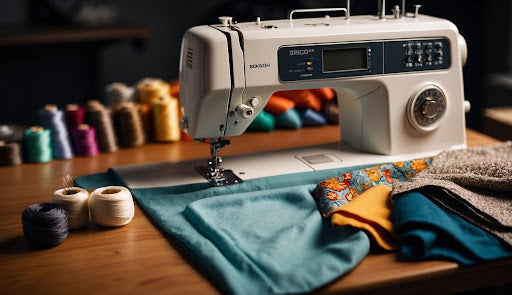
Before you begin making your pillow sham, it is important to gather all the essential materials. Here are some of the materials you'll need:
The first step in making a pillow sham is to understand the pattern.
If you're using a commercial pattern, make sure to read the instructions carefully. If you're creating your own pattern, you'll need to measure your pillow and add seam allowances.
When cutting your fabric, make sure to follow the pattern instructions carefully.
Pay attention to the grainline and direction of the fabric. It's also important to cut your pieces accurately to ensure that they fit together properly.
When sewing your pillow sham, use a seam allowance of ½ inch or as specified in your pattern.
Sew the pieces together in the order specified in the instructions. Press your seams open or to one side as directed.
For a luxurious touch, consider using linen pillow shams. Linen not only adds elegance but also offers durability and breathability, making it a perfect choice for bedding accessories.

Before you start sewing, make sure that your fabric is clean and ironed.
Ironing helps to remove any creases or wrinkles that may affect the finished product.
To begin, lay your fabric on a flat surface and fold it in half with the right sides together. Pin the fabric together along the edges to keep it in place while you cut.
Next, cut out your front and back pieces according to the measurements you have decided on.
Once you have your pieces cut out, it's time to start sewing.
Begin by placing the front piece on top of the back pieces with the right sides together. Pin along the edges to hold the pieces in place.
Now it's time to hem your pillow sham.
Fold the raw edges of the fabric under and pin them in place. Then, top-stitch around the edges of the sham to secure the hem.
You can also add a flange to give your pillow sham a more finished look.
To do this, fold the fabric over on itself and sew along the edge.
After you have finished sewing your pillow sham, press it with an iron to remove any wrinkles and make the seams look neat.
Remember to pivot at the corners to ensure that they are crisp and well-defined. Once you have finished pressing, your pillow sham is ready to use.

When it comes to customizing your pillow sham, choosing the right fabric is crucial.
You want to select a fabric that complements the decor of your room while also being functional.
If you have basic sewing skills, you can use a variety of fabrics to create a patchwork design.
Upholstery fabric is a great choice if you want a durable and long-lasting pillow sham.
Linen is a popular choice for a refreshing, summery look, while velvet and canvas add a touch of luxury and elegance to your master bedroom. Add a soft linen pillowcase for a comfortable and stylish touch.
Home decor fabric is another option for customizing your pillow sham.
These fabrics come in a range of colors and patterns, allowing you to create a unique and personalized design.
When selecting your fabric, consider the size of your pillows and the amount of fabric you will need to cover them.
Adding decorative elements to your pillow sham is a great way to make it stand out.
Flanges are a popular choice for adding a decorative touch to your pillow sham.
You can use larger flanges for a bolder look or smaller ones for a more subtle effect.
Borders are another option for customizing your pillow sham.
You can add a border to one or both sides of your pillow sham to create a frame around your design.
Quilting is also a popular technique for adding texture and visual interest to your pillow sham.
You can use batting to create a quilted effect or simply stitch lines across the fabric to create a subtle pattern.

Once you have finished sewing the front and back panels together, it's time to create a clean closure for your pillow sham.
One of the most popular methods is the envelope back closure, which involves overlapping the back panels to create a pocket for the pillow insert.
To do this, you will need to fold over the edges of the back panels and sew them in place using a basting stitch.
Make sure to use a tape measure to ensure that the pocket is the right size for your pillow insert.
Another option is to use a zipper closure, which will give your pillow sham a more professional and polished look.
To do this, you will need to sew a zipper onto the back panels before sewing the front and back panels together.
Make sure to use a fusible fleece to reinforce the fabric around the zipper and prevent it from tearing.
To ensure that your pillow sham lasts as long as possible, it's important to take proper care of it. Here are a few maintenance and care tips to keep in mind:
Making your own pillow shams is a fantastic way to personalize your bedroom decor. This easy and budget-friendly DIY project lets you choose fabrics and decorative details that suit your style. Whether you're new to sewing or not, you can create custom pillow shams that fit perfectly and enhance your bedroom's coziness. Follow the steps outlined here, and in just a few hours, you'll have unique pillow shams that reflect your taste and style.
Explore our high-quality pillow sham and bedding collection to find the perfect fit. Make your bedroom uniquely yours with custom-made pillow shams!

Can I sew pillow shams by hand instead of using a sewing machine?
Yes, you can sew pillow shams by hand if you don't have access to a sewing machine. Hand-sewing allows for more control and precision, though it may take longer than using a machine. Additionally, using clips instead of pins can be an alternative for holding fabric together while sewing, reducing the risk of pricking yourself and allowing for easier manipulation of the fabric.
Can I rotate my pillow shams to prevent wear and tear?
Rotating your pillow shams periodically can help prevent uneven wear and tear, ensuring they maintain their appearance for longer. Unlike pillowcases, which are used for sleeping, pillow shams primarily serve as decorative covers for pillows.
What is the standard size for a pillow sham and how much fabric is required?
The standard size for a pillow sham is typically 20 inches by 26 inches for a standard pillow and 20 inches by 36 inches for a king size pillow.
To determine how much fabric you will need, add 2 inches to the width and length of the pillow insert and then multiply by two to account for the front and back pieces.
How do I make a pillow sham without a flange for a cleaner look?
To create a pillow sham without a flange, simply cut two pieces of fabric to the desired size and sew them together, leaving a small opening to turn the sham right side out. Once the sham is turned, stitch the opening closed.